My Painting Hobby-How I Paint Flowers from a Photograph
Pauline J. Grabia participates in the Amazon Services LLC Associates Program, an affiliate advertising program, and earns from qualifying purchases from links in this post.
Please subscribe to my email newsletter for updates on my website and blog, and exclusive access to exclusive material in the Subscriber Content page of this website (see menu bar above). New content will be added regularly. You can sign up in the form found in the footer of this page. Thank you!
My Inspiration for Painting.
As a creative soul, I recognize the need for downtime to allow my ADHD brain to rest and recuperate. I enjoy expressing my creativity predominantly through the written word. However, I enjoy crafting, cross-stitching, and making country-style décor signs. I’ve recently taken up acrylic painting. As a beginner, I have a long way to go before I can call myself proficient. However, I’m not doing too shabbily, especially when painting flowers. In today’s post, I took a break from writing about writing and described the process I learned for painting flowers with acrylics. (Remember, I’m still a beginner, so be indulgent and kind when you view my art!)
One of the things I love about painting flowers using a grid is the simplicity of the process. I choose photographs of flowers that inspire me. I haven’t worked my way up to still life yet, but I’m getting there. The beauty of working with photographs is that they don’t move on you, and you can use a grid system to sketch them onto your canvas or acrylic paper. This makes it simple, especially if, like me, you’re not great at drawing.
The first step is to assemble everything you’ll need to paint. I use acrylic paints like the ones in the following photo. I purchased them at several places, including Amazon and Michaels. If you’re a beginner painter, I recommend purchasing student-grade paints from your local art store. They are considerably cheaper and work almost as well as the more expensive professional-grade paints. For your paint, you’ll need a palette of some kind to put your paint on and mix it. If you use premixed colors of acrylic paint, a palette may not be needed. I used a stay-wet palette I created from items I bought at Dollarama: a large plastic container with an air-tight lid, a shammy cloth, and palette paper, which you can buy from an arts and crafts store or on Amazon. If you don’t want to save your paint from session to session, a cheap plastic palette from the dollar store or even a disposable foam plate will do.
You also need something to paint on. I recommend acrylic block paper if you’re practicing and don’t care if you give away or sell your first attempts. I buy mine at Dollarama. You can also find cheap framed canvases at the dollar store for much less than going somewhere like Michaels or Amazon. In the following example I’ll show you, I used acrylic block paper cut into an eight-inch by eight-inch square. You’ll also need a set of brushes for painting with acrylic paints. I used Taklon fiber brushes of various sizes because they work the best for me. Do not use natural fiber brushes for acrylics. Save those for watercolor painting. Finally, you’ll want a pencil, black marker, and a good ruler, as well as a tub of water and paper towels for cleaning your brushes.
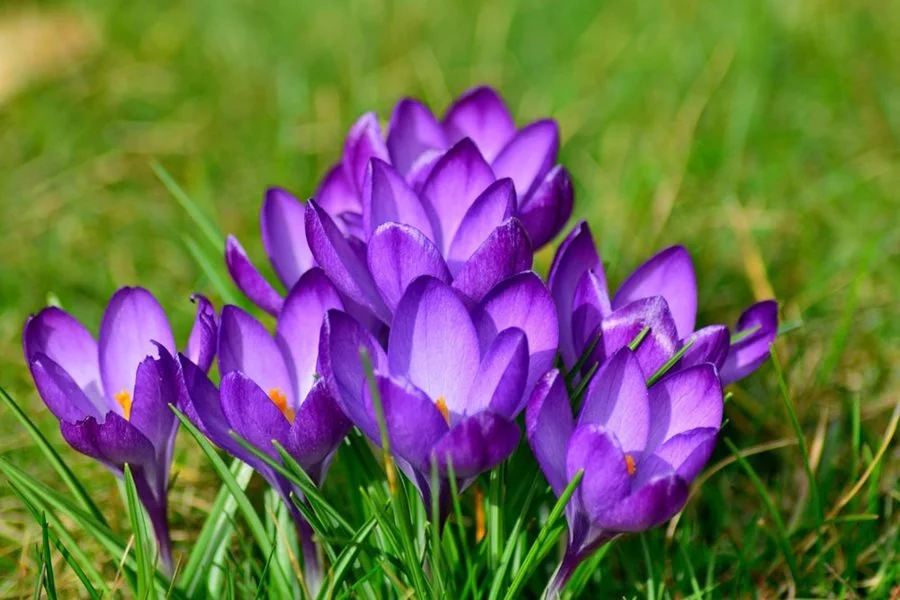
The next step is to find a photograph that you like. In this case, I found a photograph of crocuses blooming online that I wanted to recreate in paint. I printed the photograph onto regular copy paper using my inkjet printer set to the color setting. You don’t need expensive photo paper for this step because you’ll be drawing on the photograph anyway. Before I printed the photo on my computer, I used the Apple Photos app to size my photo into a square shape to fit the page when it printed. Any basic photo editing app will allow you to do the same thing. After printing the photo, I allowed the ink on the paper to dry and then cropped the photo until it was eight inches by eight inches square, just like my acrylic paper.
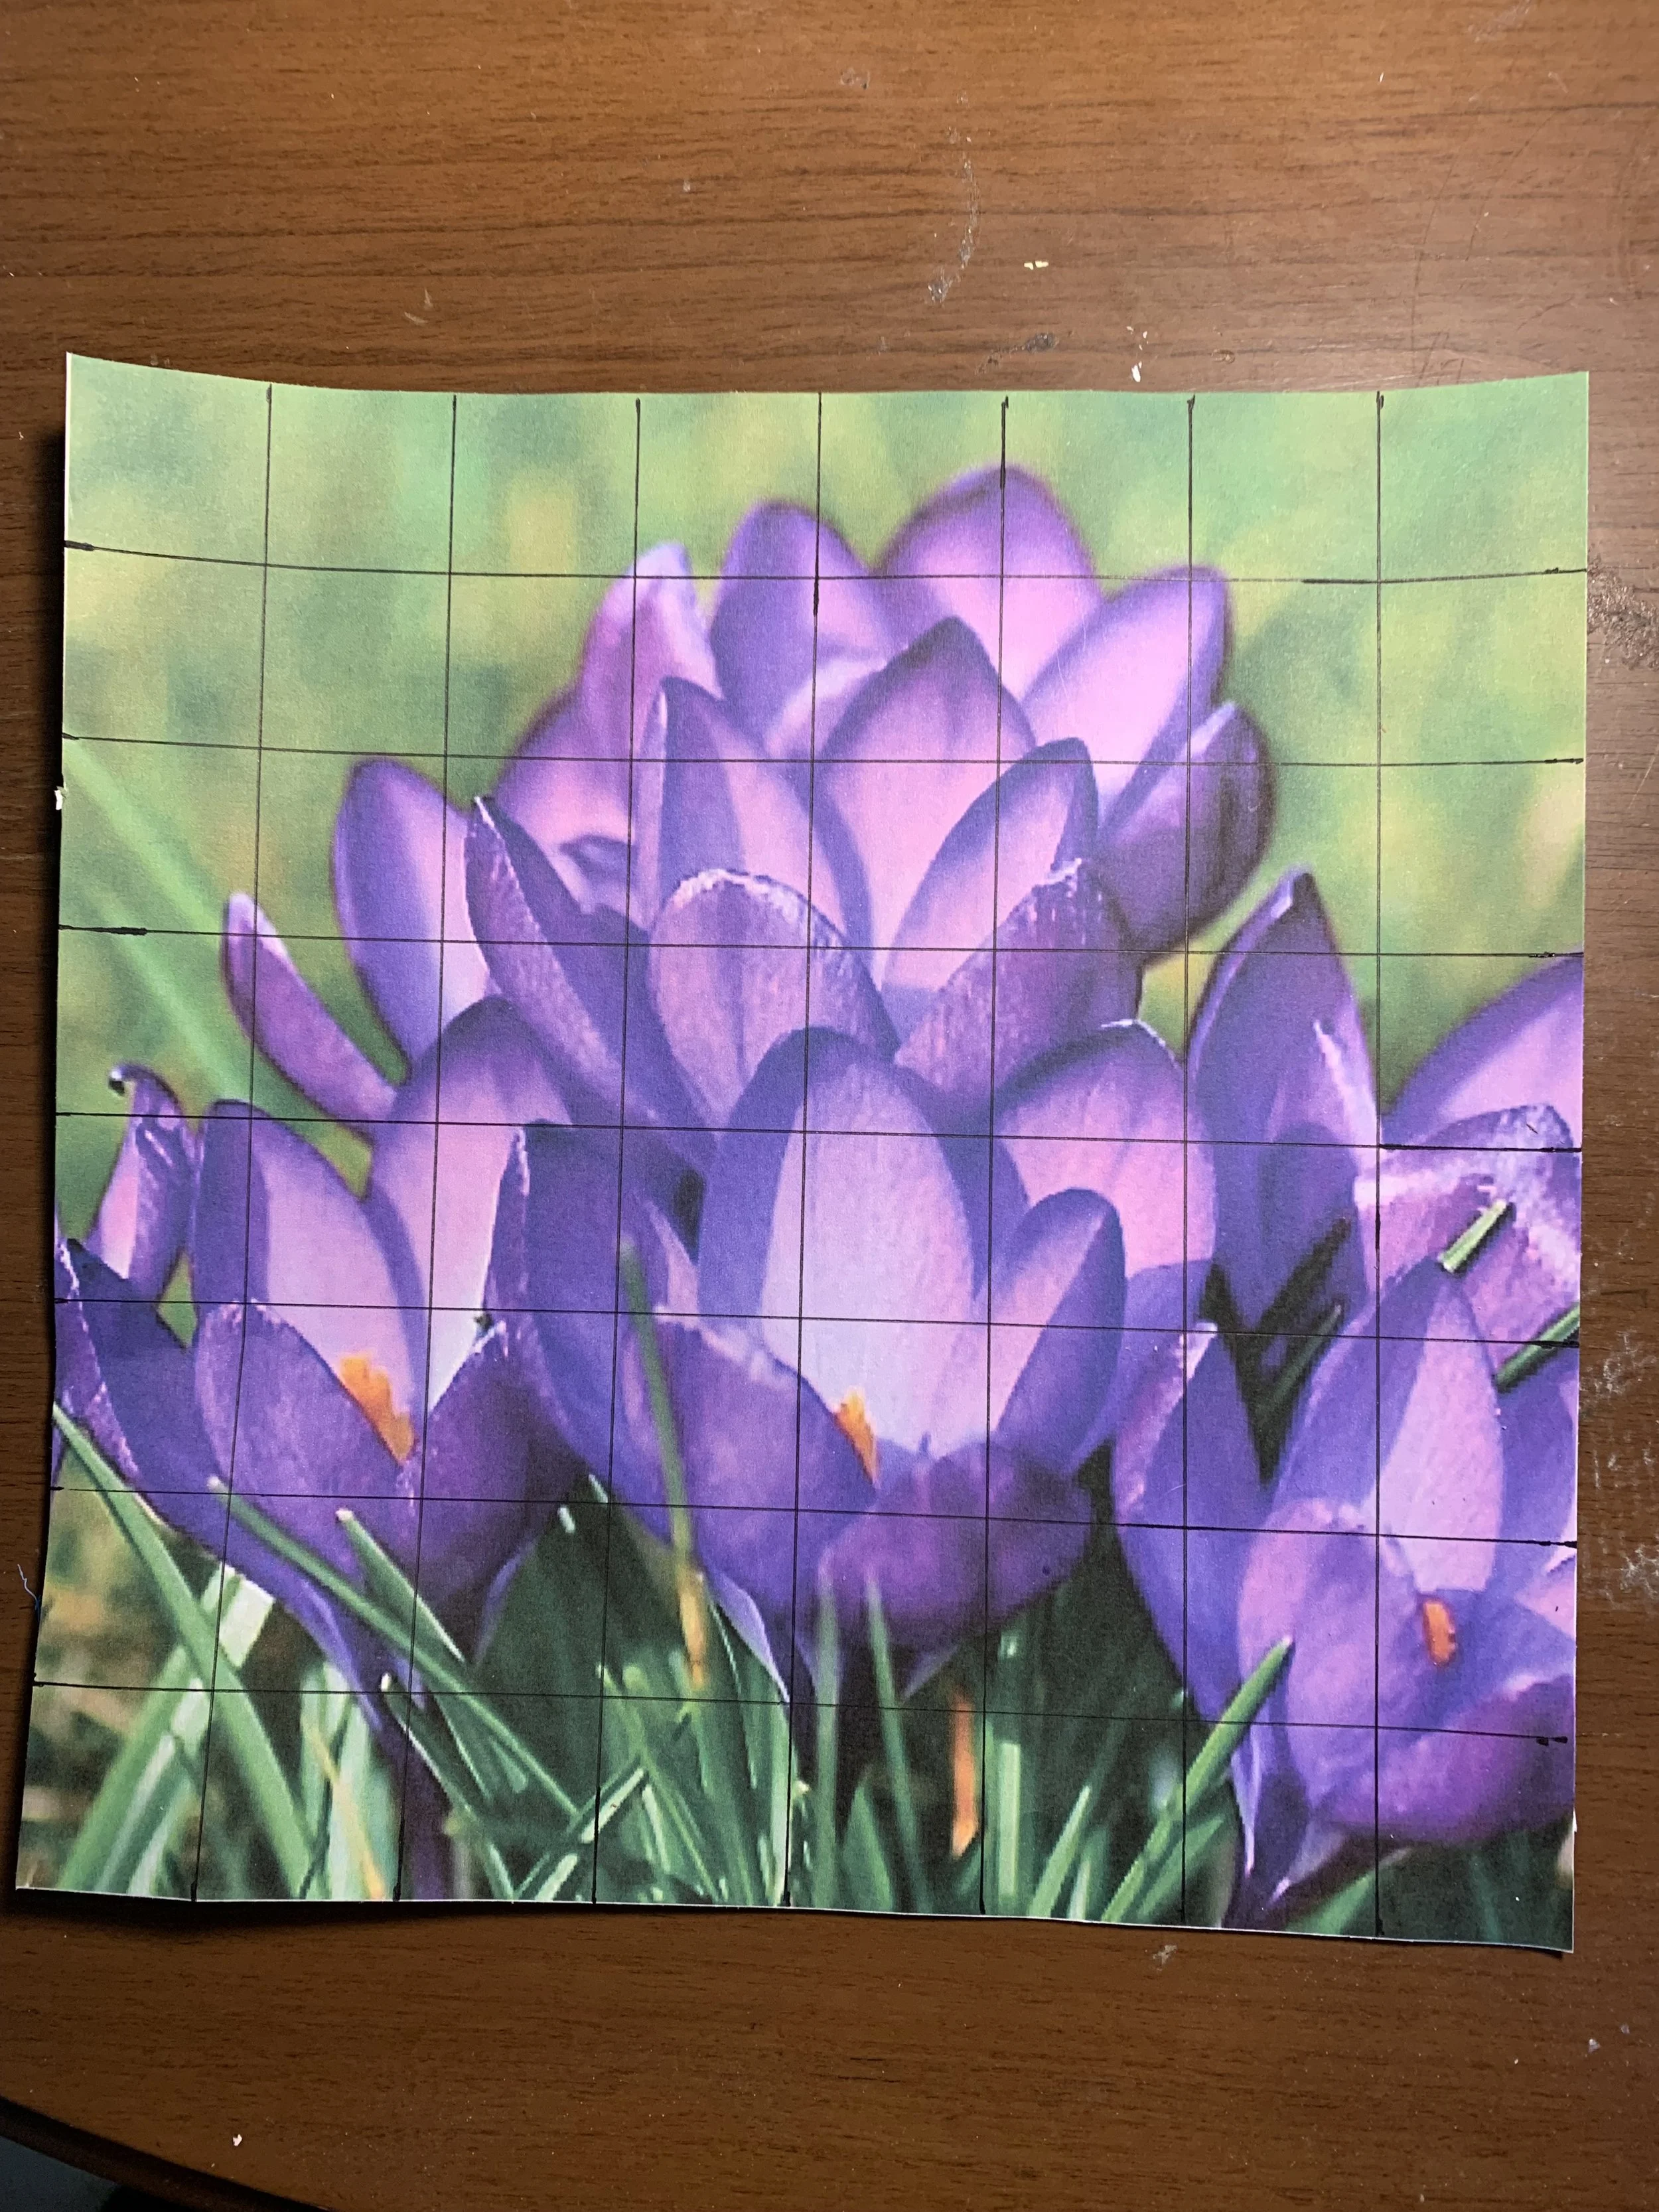
Using my ruler and a dark pencil or black ink pen/marker, I measure and draw a grid of lines on my printed photograph so that each square is one inch by one inch. (Eight inches vertically and eight inches horizontally.) See the next photo:
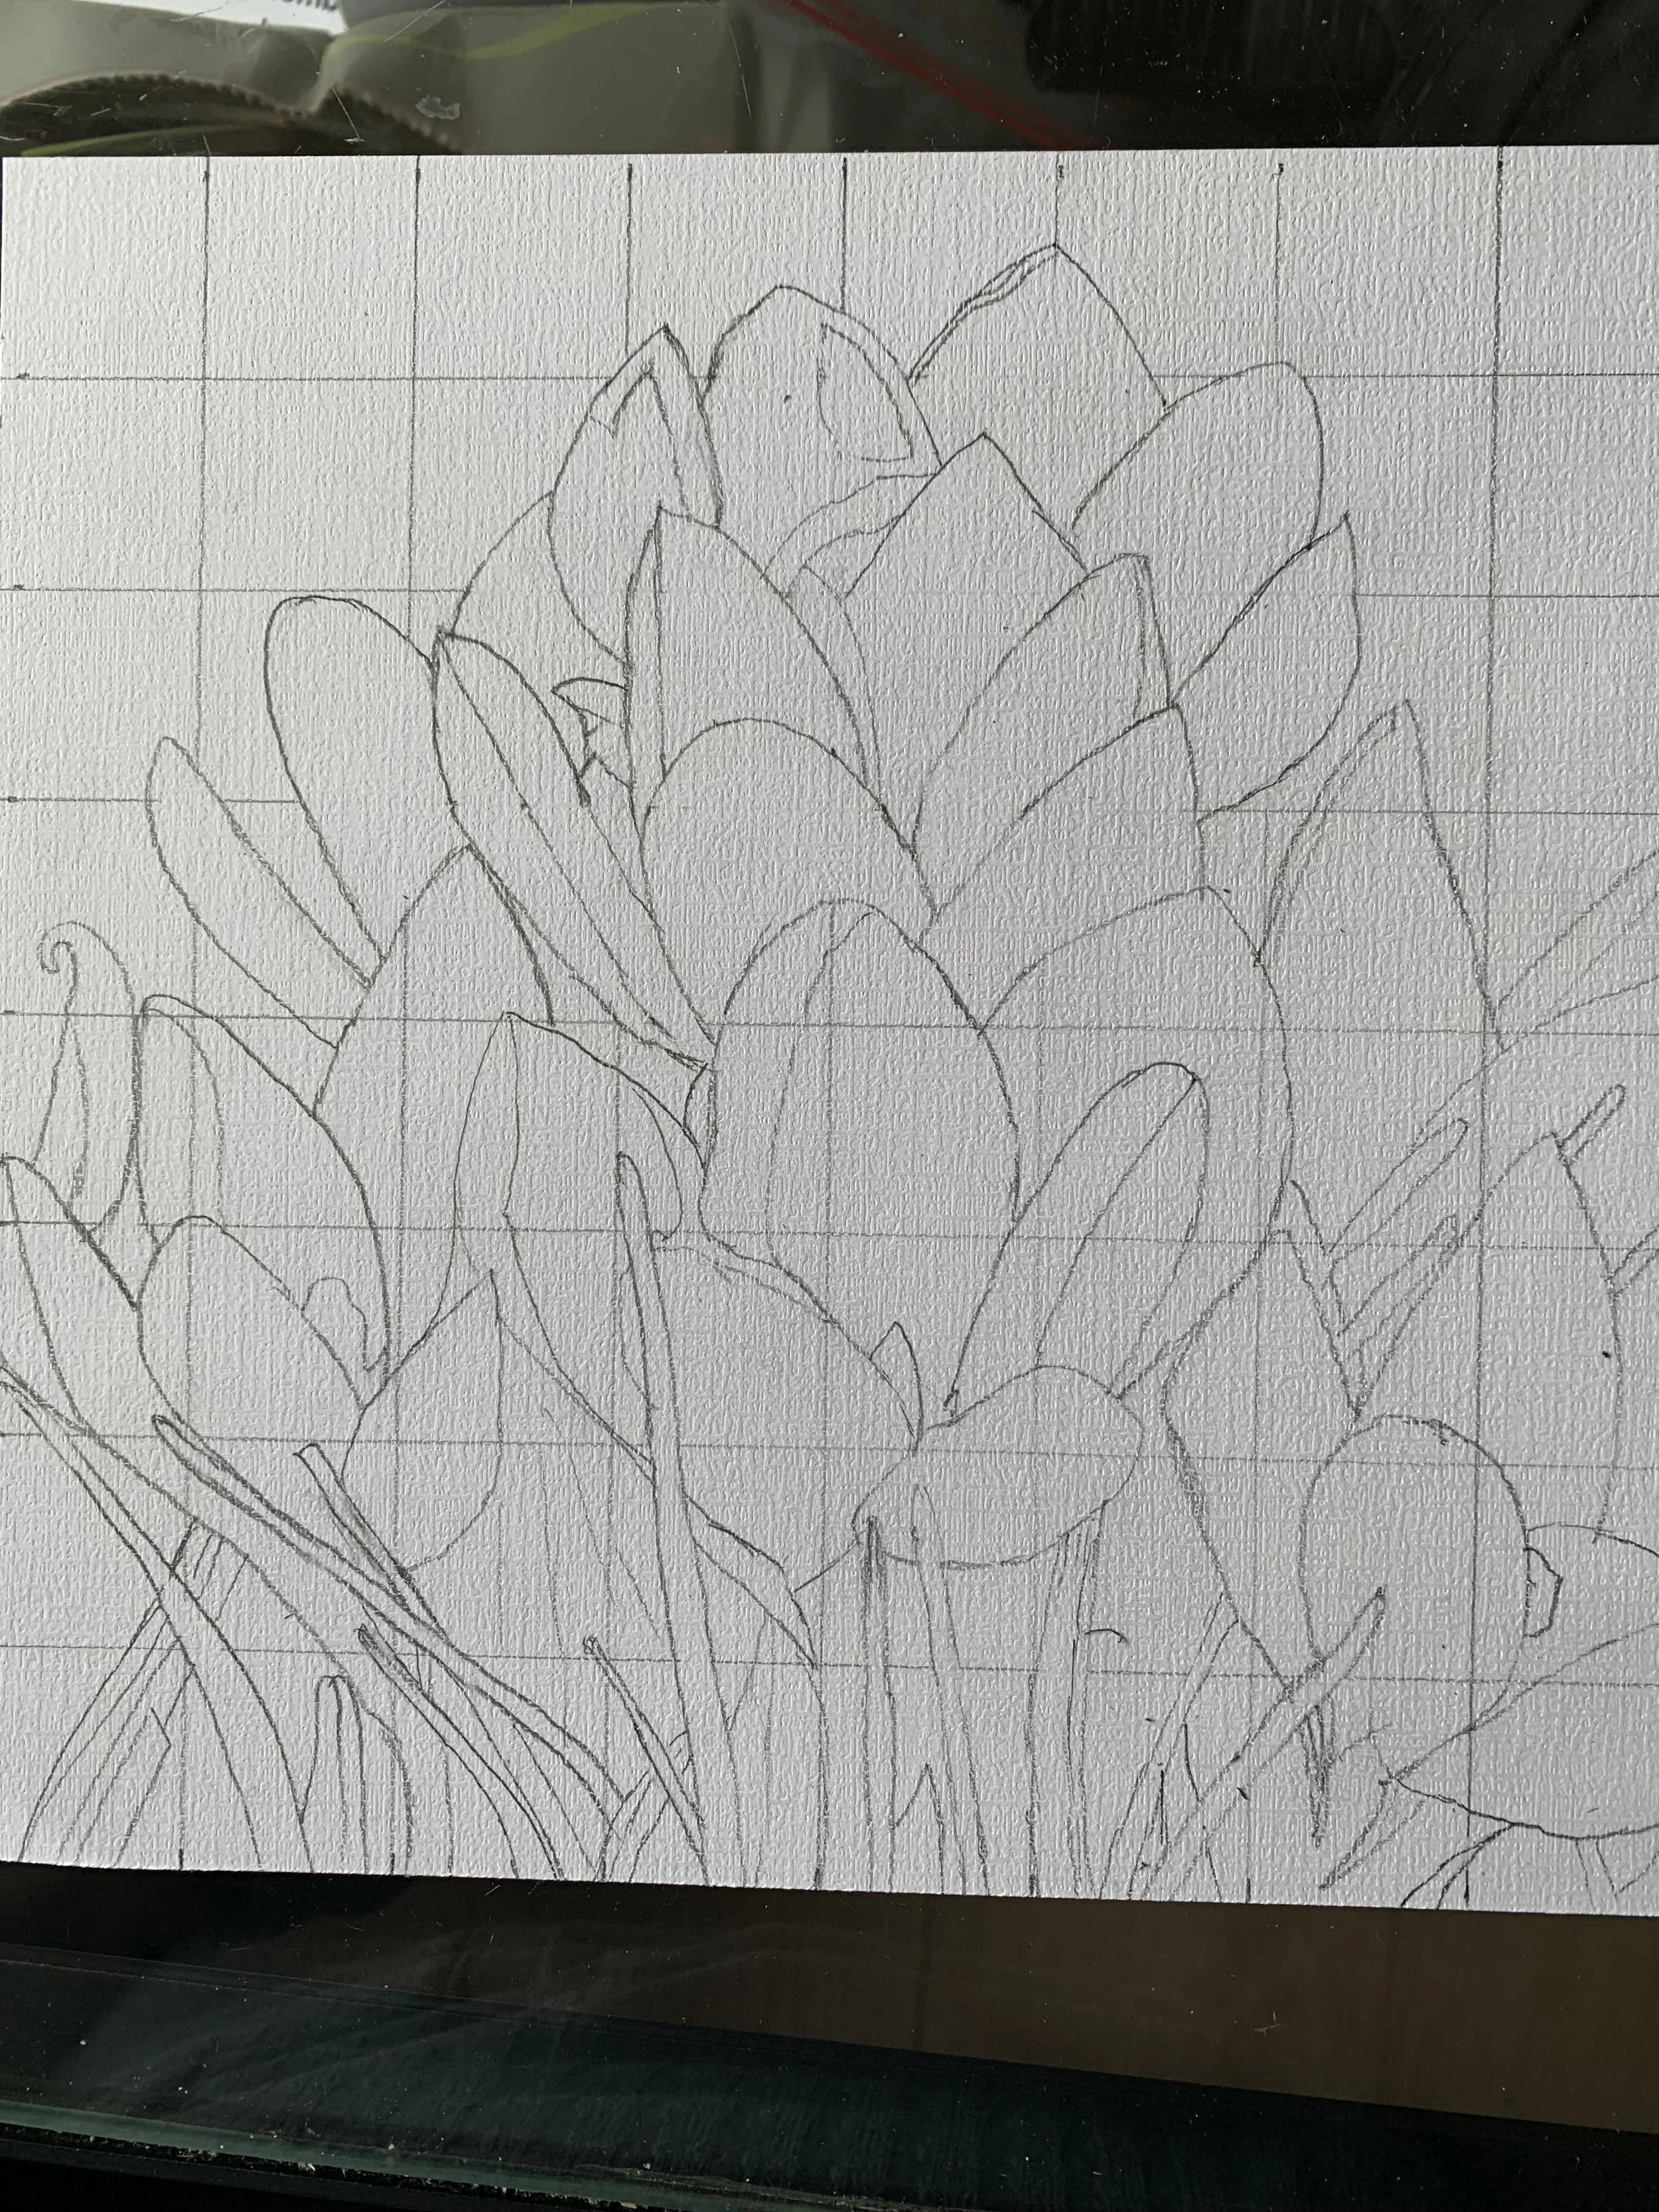
After that, I draw the same grid of lines, using a light erasable pencil, on the acrylic paper. Remember, you must erase these lines later, so don’t make them too dark. From there, I carefully trace the photograph onto the acrylic paper using the same light hand with a pencil. Go square by square, drawing only what is in each square, one at a time. It makes it much easier to reproduce the image this way. You don’t need to copy every detail from the photograph onto the acrylic paper. All you need is the general outline and morphology of the flowers and leaves. You fill in the rest with different shades of paint later.
It takes time to reproduce the photograph onto the acrylic paper square by square, but it’s worth the time and effort. Once you’ve got the image of the flowers on the acrylic paper, you can begin erasing the grid lines with a good-quality eraser that won’t leave smudges behind. Once you’re done, you should only have the image of the flowers on your paper. Now, you’re ready to begin painting.
You must experiment with mixing paint colors to get the tones, shades, and tints you want for your flowers—this takes time and practice. If you used premixed colored acrylic paints, like those left over after you complete a paint-by-number or in pods found at some arts and crafts stores, you don’t need to worry about color mixing. I recommend googling how to mix paint colors to get the ones you want for your project before you buy your base paint colors. If you get a paint kit with various colors, it makes this process quicker and easier, but it’s up to you. I sometimes mix my colors. Other times, I use leftover paint from paint-by-numbers that I’ve done.
When applying paint to your sketch, always refer to the original photo you printed off. Don’t try to go from memory. I recommend you use medium tones or colors first, then fill it in and add depth and perspective by applying the darker tones (shadows) and the lighter tones (highlights). I usually paint the flowers first and then fill in the background afterward, but it’s up to you which order you paint in. Experiment and take risks, realizing that your first attempts may not look like something painted by DaVinci or VanGogh, but that’s okay. If you’re relaxing and having fun, that’s all that matters.
This is the result of my crocuses:
I can’t say I’m thrilled with how they turned out, but painting them was fun anyway. The following photographs are of other flowers I’ve painted using this process. You may be able to see my learning curve as I went along. I may never make a living painting flowers, but I’m relaxing and enjoying myself. That’s all that matters.
I hope this instructional post was helpful and inspires you to try acrylic painting using the grid system. Thank you for reading, and I hope you try this and have a great time experimenting with paint!
Thank you so much for reading this post and visiting my blog. Please sign up for my newsletter for a monthly update about the website and blog and exclusive access to the material on my Subscriber Content page at www.paulinejgrabia.com. I am honored that you have taken time out of your day to read what I have to offer, and I will endeavor to continue to post blogs that are worthy of your continued attention. May God bless you richly.
Pauline J. Grabia


Consequence is a word with weight.
Often, we think of consequence only as punishment or fallout, something negative that follows a poor choice. But when I write Stories of Consequence, I’m drawing on another meaning entirely. Here, consequence means significance. Weight. Importance. I write stories that matter because they grapple honestly with darkness while still testifying to the reality of light made possible through God’s grace.